Although there are several other ways to make WordPress run better, reducing DNS lookups is what you often see when using any page performance test tool. Even Google wants you to focus on this component, which is essential to optimizing your WordPress website. Sometimes, the relationship between look-up time and DNS is disregarded, as is the potential influence on your website’s total load time.
Like any other factor, such as TTFB (time for the first byte) or Network Latency, DNS lookups are an important pillar that influences how well your Web page performs. The problem is that even the majority of consumers are unaware of this. How does DNS work?
What is a DNS?
The Domain Name System (DNS) converts a domain address into an IP address, which then directs the browser to the particular web server holding the website files. This server then returns the requested web page, which is subsequently shown in the browser on your device. Another term for an Internet Directory is a domain name system, which searches for the IP address associated with a certain domain name. Each device that connects to the internet has a unique IP address that other computers may use to get in touch with it.
What is a DNS lookup?
Each domain links to a certain IP address. The site is made accessible to the browser by that IP Address. The connection cannot be established without the IP address.
These IP addresses, however, have intricate mathematical structures. People can’t always recall them. A term, on the other hand, is simple to remember, straightforward to track, and brandable.
Each domain name now has its own IP address. When someone types the domain name into their browser, their ISP (Internet Service Provider) requests the domain’s nameserver. With the knowledge of the IP address that a domain name resolves to, the DNS system functions like a phonebook.
Get exclusive access to all things tech-savvy, and be the first to receive
the latest updates directly in your inbox.
DNS Lookup is the process that determines the IP address of any domain name.
The time it takes the system and browser to locate the domain’s IP address so that downloading may start is known as a DNS Lookup. The typical DNS completion time is between 20 and 120 milliseconds.
What is a good DNS response time?
The better the response time, the lower the number. DNS lookups typically take 20 to 120 milliseconds. You might want to think about cutting back on your lookups if the test indicates that your site’s response time is on the higher end of that range.
Why is it essential to reduce DNS lookup?
It is well known that one of the most important factors impacting a website’s SEO and search engine rankings is how quickly it loads. The faster your website loads, the higher it will appear in search results. A Google Page Speed Tests website speed test may show various important online vitals, in particular.
The LCP (Largest Contentful Paint) statistic, which measures how long it takes for a webpage to load from the moment the user hits the first link to the time the entire quantity of content displays on the screen, has a significant impact on how highly ranked a website is. And to be considered good, the LCP threshold should be between 0 and 2 seconds.
If there were no DNS lookup procedure, you would have to type the website’s IP address rather than the domain name into the address bar each time you wanted to access it. And if the DNS lookup page took a full second to load. It would be far greater than what Google strongly advises.
As a result, it is imperative to generate better outcomes by reducing DNS lookup times by at least 40ms.
What do DNS lookup have to do with site speed?
Every time you type a domain name like “website.com” into your address bar, a DNS query is performed. The procedure starts with the Domain Name System (DNS) of the website recognizing the address of the website you wish to visit. The DNS then obtains the website’s IP address after matching the domain with it. After then, the website’s content can start to load.
Without a DNS lookup, you would need to provide an IP address instead of “website.com,” such as “xxx.xxx.xxx.xxx.” Does that seem user-friendly or handy to you?
How to reduce lookups WordPress?
By reducing DNS lookups, your website’s loading times and bounce rates can both be improved. If you use their services, several page speed testers will provide guidance on where to start. Here are some of the best acts you can take as a substitute.

Use a fast DNS provider
The most crucial step is to choose a reputable DNS service. Both free and premium DNS services are widely available.
You receive free DNS when you purchase domain names from any well-known registrar, such GoDaddy, NameCheap, or Namesilo. These DNS providers are typically sluggish, and as requests grow, so does the time it takes to perform a DNS query.
Then there are DNS service providers with POPs in several nations, including Amazon and Cloudflare. High-quality DNSs are quick and have very little latency.
Reduce the number of hostnames
The simplest method to reduce the number of DNS lookups is to have fewer hostnames.
The overall number of requests, however, are not what matters; rather, what matters is the total number of requests made to each individual domain. Check each unique domain’s request volume, and if it is high, make an effort to reduce it.
Look at all of the external inquiries while doing a performance test on your website. Do you need the materials on your website?
Strive for a balance between the usability and speed of the website.
Host third party resources locally
You can host the outside materials locally if you don’t want to remove them from your website and the alternatives are inadequate.
There won’t be any outside requests in this manner. Additionally, you will have control over how the resources are loaded. You can control how the assets are cached and choose whether or not the CDN should send them.
You must first host the file on your server after downloading it from the external resource. It will speed up the site’s loading time more if you put it on the CDN rather on your server.
Not all resources, though, may be utilized in this way. Because they must be loaded from their server and require regular upgrades, certain third-party scripts cannot be loaded from your hosting.
However, this works well for a number of things, such as adding fonts, embedding photos, Gravatars, etc.
Use DNS cache
The IP address of the domain can be stored in memory by the browser thanks to DNS caching. The browser does not have to make a request in order to find the IP. As a result, the first speed test’s DNS lookup time is typically longer than the second’s.
Make use of the DNS caching for your benefit. The hostname may be found by the browser without using the DNS thanks to the cache.
The DNS cache’s Time to Live, or TTL, measurement.
However, there is no ideal TTL. However, you can also use averages that are deemed to have been calculated correctly.
DNS prefetching
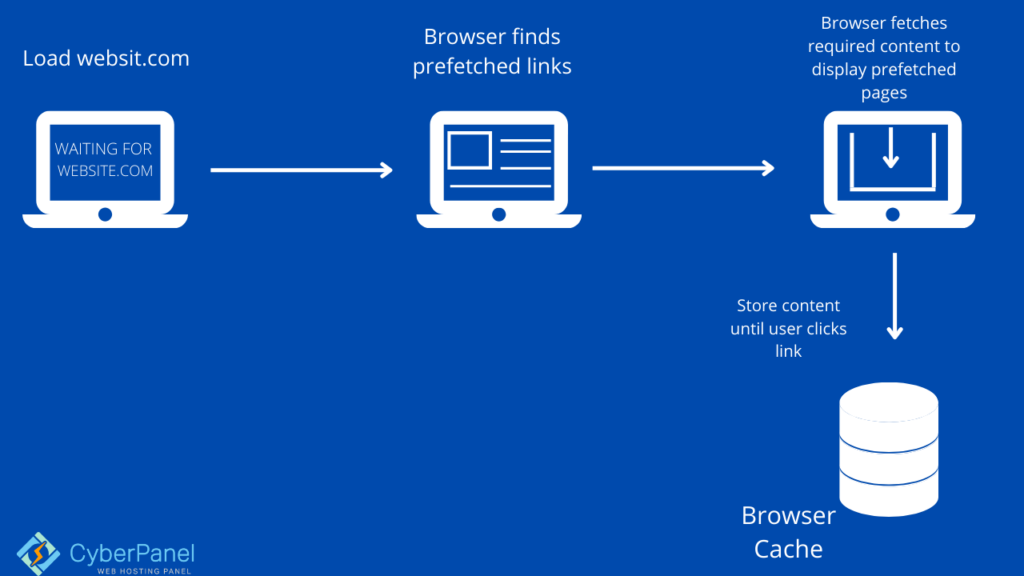
While the user is viewing the current page, the browser may discreetly carry out the DNS query thanks to DNS prefetching.
The page does not spend the time to search for the DNS when a user clicks on any link to load the subsequent page. As a result, the following page loads rapidly.

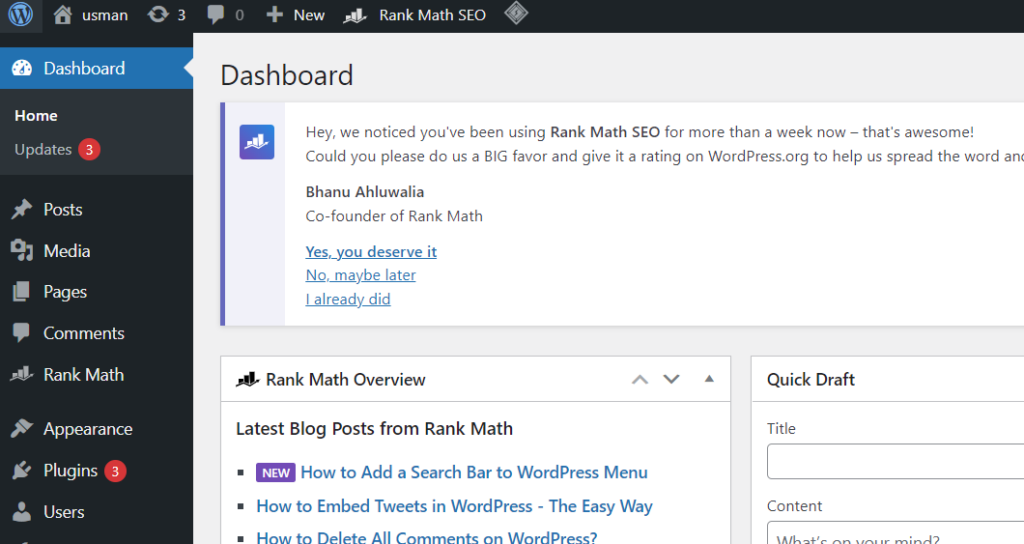
For this, go to WordPress Dashboard

Click on Appearance -> Theme File Editor from the left hand side menu

You need to access the singular.php file from the right hand side menu in Themes File Menu. In some cases you will see single.php file here instead of singular.php, both are essentially the same.

Add the following code in the file.
<!-- DNS Prefetching -->
<link rel="dns-prefetch" href="//www.yourwebsite.com">
Once you are done, click on Update File.

Use LiteSpeed cache plugin
LiteSpeed Cache offers free CDN caching as well as browser caching. It may also be used to configure DNS prefetch if you are afraid to manually write code. Additional advantages of LiteSpeed Cache include code minification and object caching. You may use the plugin to lazily load images to speed up loading even more.
You get LiteSpeed cache by default with every CyberPanel’s WordPress website.
DNS Prefetch Using LiteSpeed Cache:
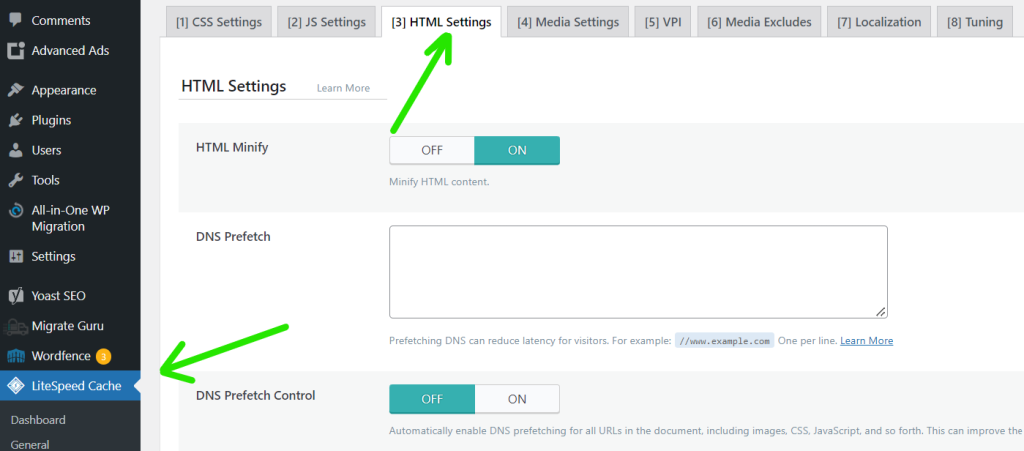
Go to the WordPress dashboard and open “LiteSpeed Cache” then select the “HTML Settings” page tab.

Now enter domain name in DNS Prefetch field box. (For example: “//www.example.com” One per line).

Now this will setup DNS Prefetch with LiteSpeed cache.
If you have any query about DNS prefetch let us know with the feedback.
Conclusion
The DNS lookup is essential for the website’s performance improvement. Although it is a little amount, if you ignore it, it might increase dramatically.
In this essay, I covered DNS lookup, how to speed up DNS lookup, and the advantages of utilizing faster DNS providers.


